Computer vision
11 min read
—

What is Computer Vision Annotation Tool (CVAT), how does it work, and what are its pros and cons? Follow this tutorial to label your data on CVAT and train your computer vision model on V7.

Alberto Rizzoli
Co-founder & CEO
Training deep learning models for solving computer vision tasks requires feeding the algorithms with meaningful data they can learn from.
The data needs to be processed, cleaned, and—most importantly - properly labeled.
Therefore, your first job is to collect and annotate training data that includes examples of the objects you want to train on—and you need a tool to help with that.
This, as you’ve probably guessed, brings us to CVAT.
CVAT is one of the most popular free image and video annotation tools that you can use to label your data.
It’s used by computer vision amateurs and professional data annotation teams alike, and our tutorial will explore the ins and outs of the data annotation process using this tool.

Source: GitHub
But—
That’s not all!
In the last section, we’ll also show you how to train a computer vision model on V7 using your dataset labeled with CVAT. Trust me, it’s much easier and faster than you think—stick with us to see for yourself.
Here’s what we’ll cover:
What is CVAT?
Getting started with CVAT
CVAT Auto-Annotation
Pro and cons of CVAT
CVAT use cases
CVAT alternatives
Bonus: How to train your computer vision model?
As you’ll learn in a few minutes, CVAT is relatively easy to use and quite flexible, but it does have plenty of limitations, too. Luckily—
We now have many more advanced data annotation tools that address those limitations and allow you to annotate your data even 10x faster (no joke!)
And while we’re not here to advertise ourselves and brag about V7’s 5-star reviews and extensive functionalities, we can’t help but let you know that CVAT is not the only option out there.
In fact, here’s a list of the 13 Best Image Annotation Tools you might want to check.
Video annotation
AI video annotation
Get started today
Now, let’s talk about all-things-CVAT (finally, right?!)
What is CVAT?
CVAT (Computer Vision Annotation Tool) is a popular open-source image & video annotation tool developed by Intel. You can either use it online (with some limitations) or install it on your local machine, which we’ll explain in a moment.
CVAT is used for labeling data for solving computer vision tasks such as:
It supports multiple annotation formats like YOLO, Pascal VOC, or MS COCO, to name a few, and if you want to dig deeper, you can check CVAT’s source code on Github. It’s distributed under the MIT license.
Don’t forget to also visit CVAT’s Documentation page in case something isn’t clear.
And now it’s finally time to roll up our sleeves and get some hands-on experience using CVAT for data annotation.
If you don’t have a dataset to work with, by the way—worry not!
You can find and download hundreds of quality datasets from our Open Datasets repository completely free of charge.
Pro tip: Looking for some inspiration? Check out 15+ Top Computer Vision Project Ideas for Beginners
Getting started with CVAT (Tutorial)
Ready to begin?
Great.
There are two ways you can label your data on CVAT—either on the CVAT website (online) or by configuring it on your local machine.
We’ll discuss both options now, starting with the simpler one—using CVAT’s web-based platform.
Annotating online
To start labeling, create an account on cvat.org. Once you’ve done that, log in, and you’ll land on this page.

CVAT's dashboard
To start annotating your data, you need to create a new labeling task.
Add the name of your dataset, the labels you want to use, and the attributes (if needed).
Next, upload your raw data either from your computer or the cloud. You can drag and drop your files or use CVAT’s command line interface (CLI) if that’s your preferred method.

CVAT's labeling task configuration page
You can also tweak some of the settings. Advanced configuration allows you to:
Configure your sorting and cache settings
Tweak your image or video quality parameters
Attach a repository to store your annotations
Choose the desired annotation format
Attach an issue tracker
After your task is created, you can find it under the “Tasks” tab, and by then, you’re pretty much ready to start annotating. CVAT will also automatically calculate some parameters (e.g., image quality score) and estimate the time needed to finish your task.

For the sake of this tutorial, we’ll annotate our images using bounding boxes in order to create a dataset for training object detectors.
Pro tip: Check out our list of Best Practices for Annotating with Bounding Boxes.
Open the task, choose a “rectangle” symbol from the menu on the left, pick your label and a drawing method, and draw your first box around the object you want to annotate.
Voila! You’ve just completed your first annotation. The class name and the annotation type will be visible on the right side of the interface for you to see.

Annotating cars with bounding boxes on CVAT
Apart from bounding boxes, you can also annotate images using polygons, polylines, keypoints, cuboids, and tags.
And hey—
Let’s not forget that CVAT also comes equipped with features such as interpolation (between keyframes for bounding boxes and polygons) and automatic annotation (more about it later).
Here are a couple of best practices to keep in mind when labeling with CVAT:
Remember to always click “Save Work” as CVAT does not save it automatically
Press “N” every time you want to create a new annotation
Always ensure pixel-perfect tightness of your labels
Label all objects in each class first
Once you’ve annotated all of your data, it’s time to export it!
Head over to the ”Tasks” tab, choose the task you’ve completed, and click “Dump Annotations.” CVAT allows you to export your annotations in multiple formats, including COCO, Pascal VOC, YOLO, LabelMe, and more.
Pro tip: If you want to import your labeled data to V7 to train your computer vision model, check out V7 Supported Formats to pick the right option.
Remember that CVAT’s online platform allows you to add up to 10 tasks per user and upload only 500Mb of data.
Installing CVAT on your local machine
So, labeling on the CVAT web-based platform—pretty easy, right?
But—
If you need to annotate large amounts of data without limitations, setting up CVAT locally is inevitable. Worry no, though—again, it’s very easy!
Below is the snippet of the installation instruction of CVAT for Windows 10 that you can find in CVAT’s documentation.
Before following this installation guide, make sure to:
Install WSL2
Download and install Docker Desktop for Windows
Download and install Git for Windows
Download and install Google Chrome. It’s the only browser that CVAT fully supports.

CVAT's installation guide for Windows
Make sure to check the instructions specific to your operating system.


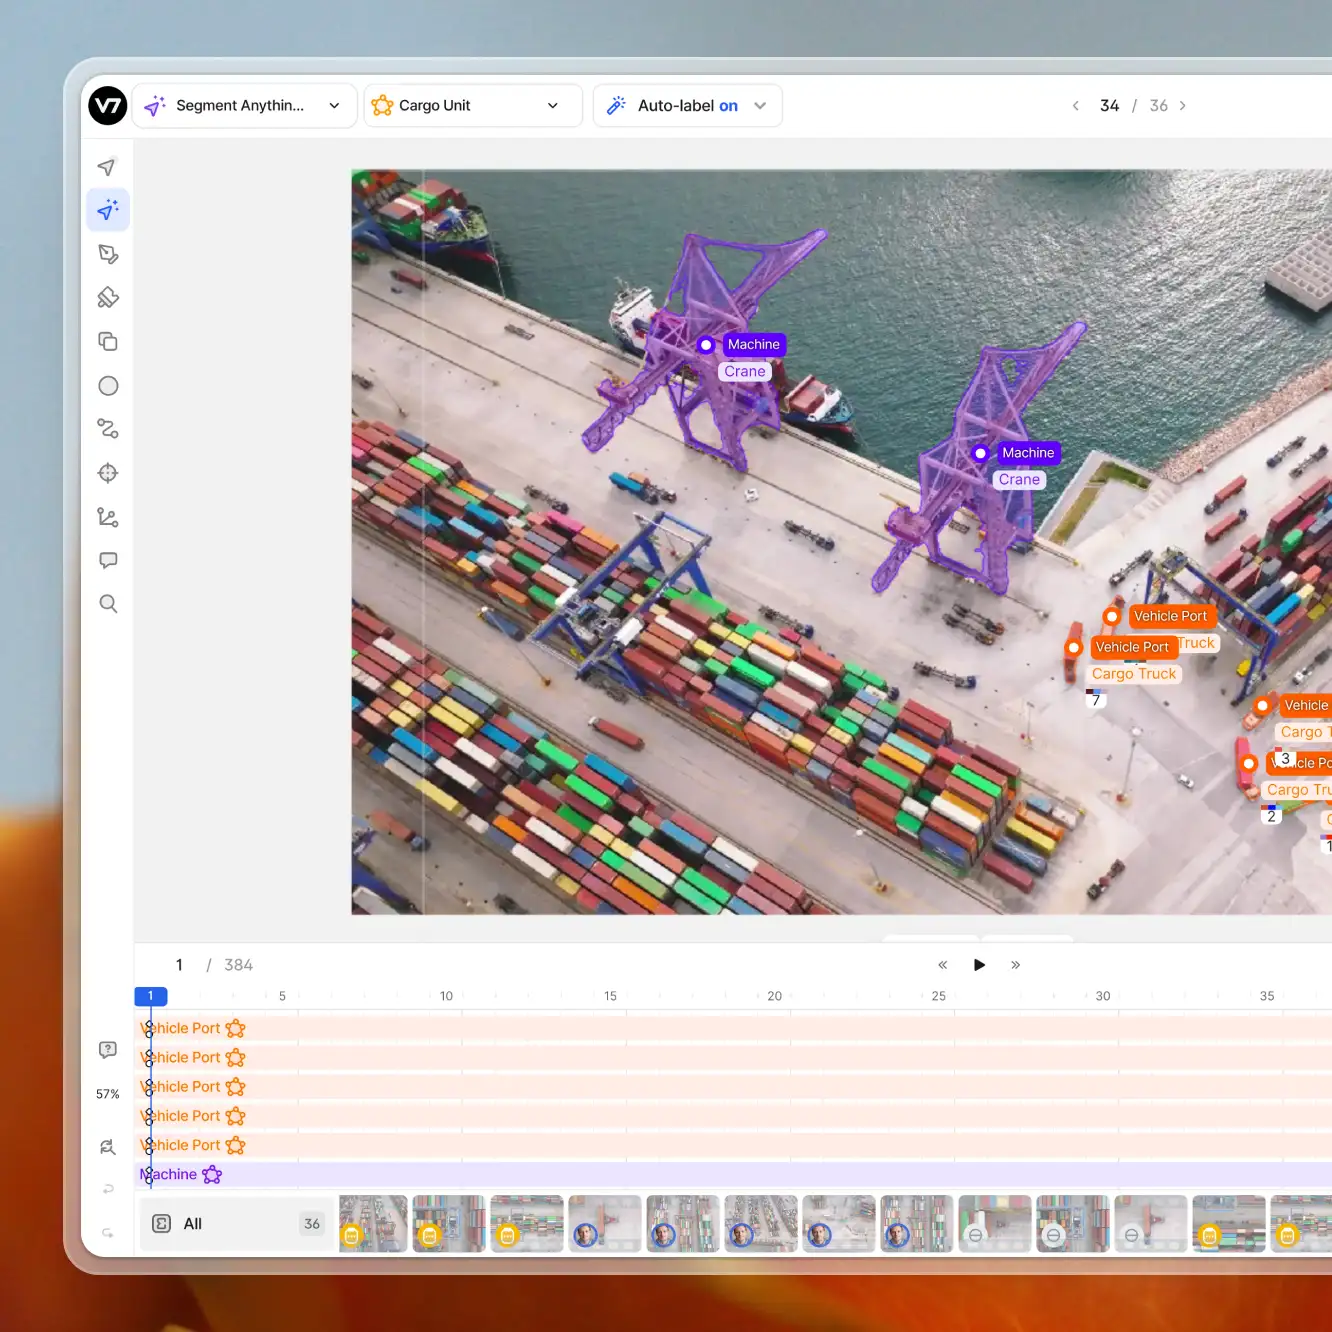
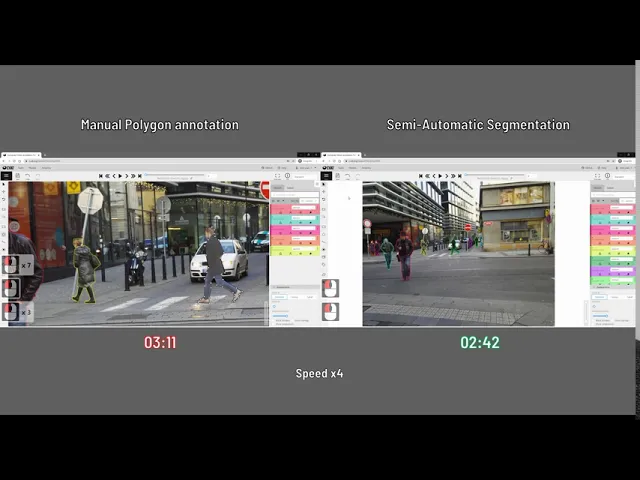
CVAT auto-annotation (Semi-Automatic Image Annotation Tools in CVAT)
Apart from manual labeling tools, CVAT is also optimized for semi-automatic annotation that can help you speed up the process significantly—even up to 4x.
Have a look at this video to get a better understanding of how it all works.
Remember: To use CVAT’s AI tools, you need the corresponding deep learning models to be available in the models’ section.
You can choose from Interactors, Detectors, and Trackers.
Interactors
You can use Interactors to create polygons semi-automatically. Available DL models from this category can be used to label any object. Depending on your use case, you’ll have to use regular, positive, or negative points to create a polygon.

Source: GitHub
Here are some models you can use:
Deep extreme cut (DEXTR)
Feature backpropagating refinement scheme (f-BRS)
High Resolution Net (HRNet)
Inside-Outside-Guidance
Pro tip: Check out The Essential Guide to Neural Network Architectures.
Detectors
You can use detectors to annotate one frame automatically. Supported models, such as YOLO-v3, are suitable only for specified labels.

Source: GitHub
Other models:
Mask R-CNN
Faster R-CNN
Trackers
You can use Trackers to annotate your objects with bounding boxes. Similar to Interactors, the available models can be used to annotate any objects. Labeled objects are automatically tracked when you move to the next frame.

Source: GitHub
CVAT’s documentation mentions SiamMask as one of the available deep learning models for Object Tracking and Segmentation.
Pro tip: Ready to train your models? Have a look at Mean Average Precision (mAP) Explained: Everything You Need to Know.
Pros & Cons of CVAT
To summarize everything we’ve covered so far, let’s have a quick look at some of the CVAT’s pros and cons:

CVAT's pros and cons
CVAT use cases
Of course, apart from annotating bounding boxes for object detection, CVAT also allows you to annotate your data for image classification, semantic segmentation, instance segmentation, and object tracking.
Here are some of the use cases (courtesy of Andrey Zhavoronkov from Delta-Course.org)
Object detection
You can draw bounding boxes, polylines, polygons, and keypoints on both image and video data.

Source: Delta-Course.org
Image classification
You can apply tags with attributes, including boolean, choice, and number or text.

Source: Delta-Course.org
Semantic and Instance Segmentation
You can segment the image and manipulate the shapes.

Source: Delta-Course.org
Pro tip: Have a look at our Complete Guide to Panoptic Segmentation [+V7 Tutorial].
If you’re curious to learn more about real-life applications of computer vision and AI, feel free to check out:
CVAT alternatives
As we mentioned at the beginning of this article, CVAT is not the only data annotation tool out there.
It’s undoubtedly one of the most popular ones, but as you’ve probably already figured—it’s also quite basic.
If you’re serious about labeling large amounts of data and doing it efficiently, you might want to upgrade to a much sleeker and more powerful platform than CVAT.
Andrew Achkar, Technical Director at Miovison, did exactly that—and switched from Miovision’s internal tool build on top of CVAT to V7, saying:
“We chose V7 because we wanted to build new types of workflows. We had our own system, but we wanted it to accomplish additional tasks like creating other annotations types, re-annotations, annotations on videos—activities that would be a lot of effort in development. V7 met our needs."
However, there are also other open-source options out there. Here’s a shortlist of the most popular (and free) annotation platforms:
1. LabelMe
LabelMe is a free online annotation tool created by the MIT Computer Science and Artificial Intelligence Laboratory. Labelme supports six different annotation types such as polygon, rectangle, circle, line, point, and line strip.
2. Labelimg
A graphical image annotation tool to label objects using bounding boxes in images written in Python. You can export your annotations as XML files in PASCAL VOC format.
3. VoTT
VoTT (Visual Object Tagging Tool) is a free and open-source image annotation and labeling tool developed by Microsoft.
4. ImgLab
ImgLab is an open-source and web-based image annotation tool. It provides multiple label types such as points, circles, boundary boxes, polygons.
Bonus: How to build a computer vision model?
Finally, let’s train your computer vision model on V7. Get your data labeled on CVAT ready!
To begin, you need to sign up for a 14-day free trial to get access to our tool. And once you are in, here's what comes next.
1. Upload your labeled data

Dataset tab view on V7
V7 also allows you to upload your data via API and CLI SDK.
2. Choose your model
Head over to the “Neural Networks” tab to pick the model you want to train.
Depending on how you labeled your data, you can choose to train an Instance Segmentation model (polygons), an Object Detector (bounding boxes), or an Image Classifier (tags).

Training a computer vision model on V7
Name your model, and click “Continue.”
3. Choose your dataset and review class distribution
Pick your labeled dataset and check whether your class distribution is balanced. Make sure you avoid situations where your classes are either overrepresented or underrepresented. This will hinder your model’s performance.

Class distribution view
Next, V7 will show you the split between your training, validation, and test set. It will also calculate the time and cost of this training session.

Training, validation, and test set split
All you have to do is click “Start training” and voila—
You trained your first computer vision model! You can go ahead and work with it or keep re-training your model to improve its performance.
V7 supports model-assisted labeling where your model can constantly learn on its own and help you annotate new batches of data even 10x faster.
Got questions? Let us know or head over to V7 Academy.
We hope to see you training your models on V7.
Good luck!
Read more:
The Beginner's Guide to Self-Supervised Learning
Overfitting vs. Underfitting: What's the Difference?
The Beginner's Guide to Deep Reinforcement Learning
The Complete Guide to Ensemble Learning
A Newbie-Friendly Guide to Transfer Learning
The Essential Guide to Zero-Shot Learning
Supervised vs. Unsupervised Learning: What’s the Difference?
9 Reinforcement Learning Real-Life Applications
Mean Average Precision (mAP) Explained: Everything You Need to Know


