External Models

V7 allows you to BYOM (Bring Your Own Model) in just a few clicks. We outline the process.

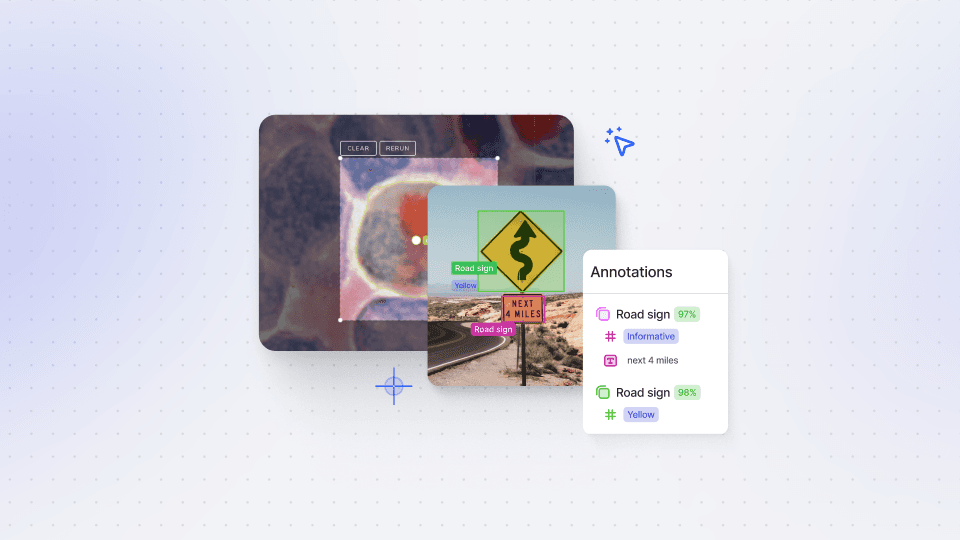
In this session, we will walk you through the process of registering and running inference on your own models in V7. Our recent Bring Your Own Model (BYOM) update has made it easier than ever to register external models with just a few clicks, unlocking a world of possibilities for your AI projects.

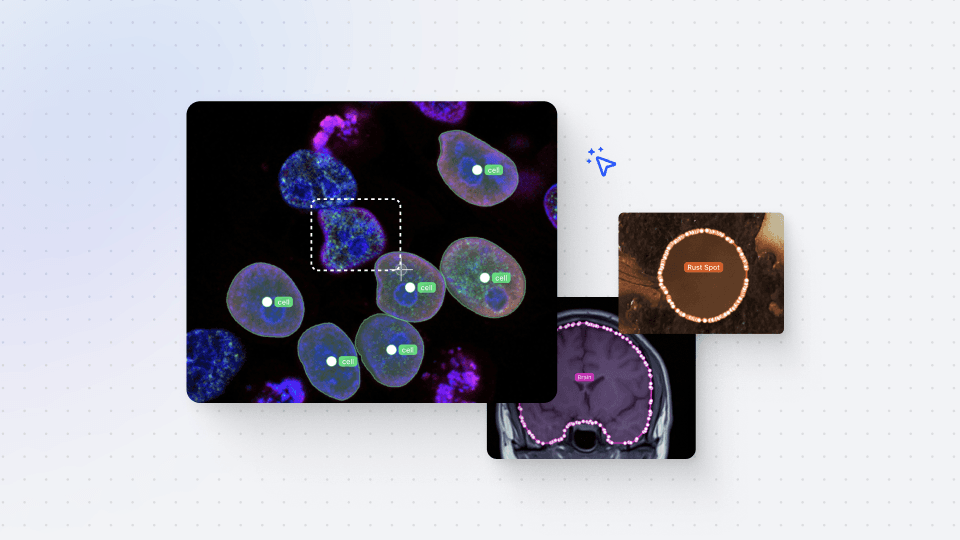
External models can be a game-changer, helping you accelerate your work or solve industry-specific challenges. For instance, if you require a tool for segmenting pieces of clothing, you can utilize an existing third-party instance segmentation model that has been fine-tuned specifically for clothing items.

To get started, we'll provide an overview of the setup, followed by a detailed explanation of the Darwin JSON structure and how request processing works. We will then guide you step-by-step through the process of registering an endpoint, setting up the web app, deploying the model, and finally, connecting and testing the model.

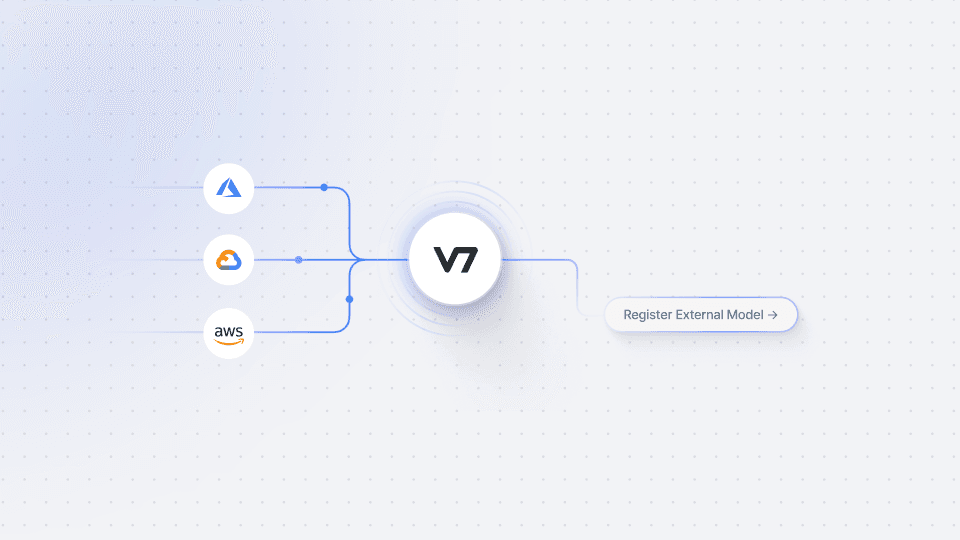
With the BYOM feature, you have the freedom to register custom models and integrate them seamlessly into V7. You can also leverage open-source models or connect with public models available online on platforms like Hugging Face. This flexibility empowers you to tailor your AI workflows to meet your specific requirements and harness the power of diverse AI models. It's worth noting that when using models hosted on Hugging Face, the process becomes even simpler. You can easily add the inference URL and upload a test photo to capture the response and map your classes.

Link to the model used in the tutorial: DETR (End-to-End Object Detection)

There are so many different open source models or ones which you have trained yourself that can assist you with labeling further data.

What does that mean? And how does it work?

Well, in this video, I'll show you how to register and run inference on such a model in V7's Darwin via the UI in just a few clicks.

What this allows you to do is get instant access to open-source models and map their output classes to V7 labels, connect V7 workflows with your own image processing models to automate complex tasks, and enhance the auto annotate tool with custom models to tackle unique challenges.

Ultimately this will help you develop better models faster and leverage humans in the loop a lot more effectively.

Okay, on a high level, what will we be doing? Our register external model feature allows you to set up an HTTP endpoint address and authentication method. You can also specify the output classes to be extracted from the JSON responses and map them as V7 annotations.

To leverage those external models in V7, we will configure an inference endpoint for any AI model that is hosted online and meets minimal requirements.

This extends to services such as AWS, Azure, Google Cloud, and other servers that accept and respond to web requests via the HTTP protocol. In the near future, integration with Hugging Face models directly will also be supported.

Let's go into a bit more detail. How this works is that V7 sends a JSON payload using the POST method to a specific inference endpoint. This JSON includes information such as the image URL, along with an authentication token and additional parameters, such as the coordinates of the image area outlined with the auto annotate box.

This JSON payload example is sent to our registered inference endpoint when we send an image to the model stage with the external model connected. Note that there are no additional parameters.

The contents of this JSON file can now be processed by our web app, for example, a Flask server to extract the image or its relevant area.Then the image can be processed by our AI model and our web app can send a response. Our response will then look something like this and will automatically, for example, add a bounding box annotation to the area where a face was detected.

Now let's get practical. You can use an external model in V7 via the following four steps.

First, set up your server or app to accept HTTP requests. Then, ensure that your requests and responses conform to the Darwin JSON format. We actually have a very useful full video on our Darwin JSON format which you can take a look at.

With that, you can now register your external model's endpoint in the model page and finally use the model as a workflow stage or via auto annotate.

Okay, let's walk through this together.

Step 1. Register a new external model. Go to the models panel and click the register external model button. You can change the endpoint URL address, classes, and name of your external model at any time. Therefore, it makes sense to register the model from the start, even if it's not active yet.

Also, you can set up a temporary endpoint to capture your HTTP requests. This may be useful as a starting point for coding your app for handling the model.

I'm going to use a hugging face object detection model with the ResNet backbone on some images of traffic lights. A link to the model is in the description.

I got the model API, again, through HuggingFace, and I will use it in my Python code that will run the whole logic. To familiarize yourself with the way V7 sends requests, you can use popular tools like RackBin or Insomnia for experimentation.

Step 2. Prepare your web application and define the necessary functions.

This is probably the most complicated part, but after walking through it together, you'll see that it really isn't that bad. Of course, the level of complexity may vary depending on the framework you use. However, your application should achieve the following:

Set up a web application, such as a Flask app. Define an endpoint in the app to receive incoming data, for example, “/infer”. Configure the endpoints to handle post requests. Retrieve the incoming data, which as mentioned will be in the form of a JSON payload. Extract the image data from the JSON. Implement the necessary logic to analyze the image with your AI model.

In this hugging face example, this includes adding the API token to the message header and calling the model via the API while providing the image data.

Then convert the annotations from the HuggingFace response format to the Darwin JSON format. Finally, have your app return those results to V7.

In our example here, we want to detect traffic lights.

A response JSON object is prepared depending on whether a traffic light is detected or not. The object includes the confidence, label, name, and bounding box coordinates.

Next up, step three, deploy your model using a solution that accepts HTTP requests.

There are multiple deployment options available for your model, including cloud platforms like Azure and AWS, as well as platforms such as Heroku.

In our example, we'll simply use a free tier ec2 Ubuntu instance on Amazon Web Services for deployment. This instance enables you to create a public IPv4 address that can serve as the endpoint for the deployed model. Just add “/infer” or whatever URL you used in the previous step to access the model.

The deployment setup is based on Flask, Gunicorn, and Nginx. By combining these three core libraries, you can establish a reliable and scalable deployment infrastructure for your model. Flask enables the development of the API for our model. Gunicorn effectively manages concurrent requests and Nginx acts as a gateway, ensuring proper routing of requests to the Gunicorn server.

Finally, step four, setting up the correct endpoint address and testing the model. After deploying your web application, update the endpoint address as shown here on the left-hand side. Classes can now be registered manually through the register classes section on the right-hand side. Now you can finally add a new model stage in your workflow.

Connect your external model and map the output classes. You can now navigate to your dataset and send several images to the model. If everything went correctly, they should pass to the model stage and then to the review stage. almost immediately. Here you can review the results and any potential errors or issues encountered during the analysis.

And done!

That wasn't too difficult, was it?

Let's again go over why this is particularly useful.

You get direct access to open-source models: You can solve tasks such as pose estimation with OpenPose, or use external libraries for facial landmark detection. While models trained on V7 are perfect for classification, object detection, and instance segmentation tasks, you can leverage the power of external models to expand on those capabilities.

Easier benchmarking and model performance testing: Running an external model, for example, as shown as a Flask-based app, allows you to collect more information and generate additional logs for your models and their interactions with your dataset. You can also connect multiple external models using a consensus stage and compare their level of overlap.

Additionally, you can use models across multiple V7 teams. Since models trained and deployed with V7 use the same JSON structure, it is extremely easy to connect models and use them across multiple accounts. This can be useful if you need to discuss an experiment with solutions and use cases.

The ability to connect V7 native models with just a few clicks can be helpful for troubleshooting and finding the best solutions for your use case.

That was it. Using your own models has never been easier with V7.

We're excited to see what you build using V7.