Playbooks
10 min read
—


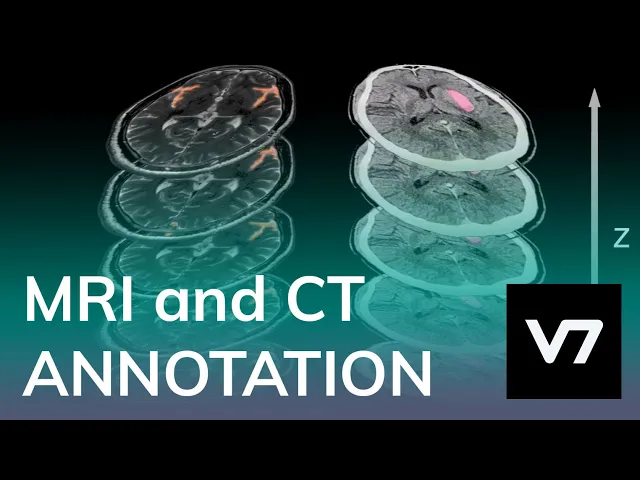
Find out how to label CT/MR scans, X-rays, and other modalities used in radiology. Learn how to use AI labeling tools for segmentation or lesion detection.

Casimir Rajnerowicz
Content Creator

The use of machine learning in the medical field is a topic of great interest these days. Radiology is no exception. In fact, neural networks are increasingly used to help radiologists interpret images and make diagnoses. For example, computer vision models can automatically detect and classify different types of tumors on CT scans.
But—
An AI model is only as good as the data it is trained on. In fact, any bias in the data could be amplified by artificial intelligence. Additionally, the majority of data labeling tools do not support medical imaging or volumetric data formats.
That’s why it is so important to process and label the input data the right way.

Medical imaging annotation
Medical data labeling
Get started today
Let’s say that we want to train an AI model that tells apart COVID cases and non-COVID viral pneumonia based on X-ray images.
Here is an example of what our ideal data labeling workflow might look like:
Step 1: Uploading files to our training data management platform

Step 2: Creating class labels and annotating the relevant areas of our X-rays

Step 3: Going through a review process to assess the quality of the labels

Step 4: Training a new AI model

Step 5: Using the model for automatic detection of different classes (such as types of infection)

It seems to work just fine, doesn’t it?
The instance segmentation model above automatically chooses which area of the X-ray is relevant. It highlights our regions of interest and also assigns the suspected class based on our training data (Covid for COVID infection and Pneumonia for non-COVID viral pneumonia). AI models can detect patterns with mathematical precision and evaluate how accurate (the percentage value) the predictions are.
However, let’s take a step back.
Before we even start to label our data, we should consider several factors. For example, what if some of our patients were connected to electrocardiogram sensors? Or, what if most non-COVID viral pneumonia cases in our sample were among adolescents while the COVID cases were almost exclusively adults? Sometimes, AI models are too closely tuned to your training data, and they don't generalize well to new data.
It is time to take a closer look at some common challenges of radiology data annotation. And how V7 can help you out.
Challenges in annotating radiology data
Some challenges are strictly related to limitations of different imaging technologies used in radiology. Segmenting organs and structures in CT, MRI scans, or X-ray images is a difficult task in itself due to the low contrast between different tissue types. For example, it is hard to determine the ground truth for certain types of images, such as those that show a tumor.
On top of that, you have to consider aspects such as
Dimensionality of the data. Radiology images come in series, which are often volumetric, making the annotation problem inherently three-dimensional.
Availability of training data. Homogeneous and consistent medical images are hard to obtain, especially for healthy patients for ionizing modalities. There are many open datasets, but they offer random data of varying quality and origin.
File formats unique to the medical field. Some data labeling tools don’t support DICOM or NIfTI files. They also have problems with processing large files, which are not uncommon with some modalities, such as 4D cardiac CT scans.
The need for expert annotation. Radiology images are often hard to read and require a high level of expertise to interpret.
The wide variation in image quality. Images can vary widely in terms of quality, depending on the modality used to acquire the images.
Manual annotations take hours. Drawing and editing polygon masks around specific bones, tissues, or objects is very time-consuming.
Data anonymization and compliance. DICOM files often contain sensitive patient information that needs to be anonymized and there are many regulations (such as HIPAA) that restrict the use of radiology images.
All of these things increase the difficulty of creating your own ML labeling framework from scratch.
Importing, managing, and annotating radiology data is a complex process. And you cannot train a good model without quality assurance and consistency. AI training data needs to be verified, double and triple checked, and it needs to go through several review stages.
Thankfully, there is no need to reinvent the wheel on your own.

V7 can address all of the issues mentioned above.
The platform provides a set of unique features for handling files used in the field of radiology and medical imaging, including volumetric modalities and hanging protocols
It lets you organize your data into folders, assign tags, or use advanced filtering options to manage your datasets
You can import existing annotations, map classes, and export annotations in standardized formats such as JSON
Custom review stages and consensus agreements involving AI models or multiple reviewers based on their seniority level
There are different image adjustments, measurements, rendering presets, and color maps that make the labeling process easier and more accurate
The auto-annotation and polygon interpolation tools make the labeling process much faster
Your data is encrypted, anonymized, and your can implement the tools on-premise to meet legal requirements
Additionally, our network of professional labellers for hire includes scientists and radiologists. If you want to get them involved, they can help you review the annotations or handle them from start to finish. Obviously, it is up to you. You can take care of managing your projects completely on your own and within your team.
Best practices for radiology data labeling and model training
To label an MRI or CT scan you need much more than a good understanding of the anatomy. A radiologist has to identify various structures and then label them across different dimensions.
Now, if you want to train a machine learning model, you need lots of data. Quite often, this means repeating the annotation process for the hundredth and thousandth time and going through large datasets of medical images. It can be a daunting task.
There are however some strategies and tools that can make the task easier.
Here are some good practices and interesting features that you can use to improve your radiology annotations:
1. Make use of the AI-assisted labeling
You can add tags or automatically label your data with custom models. For example, you can set up a custom AI object detection model that will automatically recognize images containing artificial cardiac pacemakers or other medical devices.

For this kind of automatic detection, all you need to do is label 100 instances of an object with bounding boxes. Once you do that, train your model in the Models section of the panel (it takes about 15 minutes), and you are good to go. Start the model, add a model stage in your workflow, and you can detect objects in thousands of new images with a click of a button.
These types of auto-annotations are great for mass operations on your datasets. You can use these auxiliary annotations to filter out outliers or to pick a specific category of images.
2. Use image manipulation and adjustments for a better annotation experience
Some anatomical structures are quite prominent and easy to label. Sometimes, a tumor segmentation task may be very straightforward. But in other cases, labeling lesions and structures seems next to impossible. To improve their visibility you can use several in-built image manipulation tools, filters, and presets.

For example, an ultrasound scan may be easier to interpret and annotate if you change the color scale. With a dental X-ray you may find that the Bone filter makes your images easier to annotate. You can improve the contrast of your images, alter the display thresholds. And the Invert option is a great tool to use if you need to delineate and label subtle differences in brightness. Some readers are more used to working with an inverted PT image.
3. Add consensus stages to your training data workflows
Consensus stages added to your review process allow for adjudication of your annotations between different readers. You can specify to what degree your data labels need to overlap to be considered valid.
For example, a workflow manager can assign the same annotation task to a junior radiology technician and one of diagnostic radiographers. If there is a high degree of agreement between the annotations, the annotations can be pushed further down the ML training pipeline. On the other hand, if the overlap is low, you can have the annotations reviewed by a senior radiologist. They can adjust the annotations personally or leave their feedback.

The consensus stage is also very useful for testing your new deep learning models. You can check the performance of your model by having it annotate a small subset of data. For example, your model can outline and label a lesion in a series of MRI scans. You will then be able compare the AI-based medical image segmentation with the annotations of a skilled human radiologist.
4. Use orthogonal views while working with volumetric data
V7 offers an experience similar to that of your favorite DICOM viewer. If you are working with volumetric data, take advantage of the image registration views in the main annotation panel.
V7 supports customizable layouts, and an MPR hanging protocol for optimal display of volumetric data. Your imaging series will automatically split into axial, coronal, and sagittal views. This way, you can visualize how your labels are applied in 3D space and make sure that they are consistent across different slices. This feature is essential for medical image annotation.

You can change your position in 3D with your mouse or touchpad. There are also additional crosshair overlays, measurement, and navigation tools that will help you navigate different views with ease and know exactly where you are.
5. Speed up the annotation process with interpolation between frames
Volumetric data (such as cross-sectional images of a CT scan) works like a sequence of images. This means that you can use the same tools that you would normally use for videos and video frames. One of the most important video annotation features this unlocks is interpolation.
Interpolation is a process of creating new annotations that are based on the existing ones. For example, if you have annotated the boundaries of a tumor in two distant CT slices, you can use interpolation to create in-between labels automatically.

In the example above, we started with one annotation of the spinal cord. Then, we adjusted it every couple of slices. As you can see, the annotation morphs smoothly between all slices. All of the additional labels between our key frames were auto-generated.


6. Keep your data organized and use tags for better asset management
Many machine learning projects fail because of poor training data management. When you are working with a large dataset, it is important to keep your data well organized. You should have a separate folder or tag for each modality, body part, and disease. This will help you to find the data you need quickly and will make your labeling and training processes more efficient.
V7 also supports DICOM and NIfTI files. You can easily import and export your data in these formats. Additionally, you can use the platform’s built-in tools for image processing and data augmentation.
7. Validate your AI models fast with prototypes trained on the platform
Proof of concept testing can help you identify any potential problems that need to be addressed before moving forward with your idea. This is especially true when it comes to machine learning and computer vision projects. With so many factors, and so many ways to fail, it’s important to test your ideas before going all in.

Training several small-scale models with different types of training data can help you assess the feasibility of your project. Getting insights from these experiments can help you avoid wasting time and resources. This can mean saving hundreds of annotation hours of expert radiologists and medical professionals.
In V7, training new models from scratch takes only several minutes. And you can start with as little as one hundred annotations for segmentation, object detection, or classification. Overall, V7 can help you move through the proof of concept stage quickly and efficiently. By doing this, you can focus on developing high-quality machine learning models that meet your needs.
If you are interested in learning more about how V7 can help you with your radiology labeling tasks or you want to see the platform in action, book a demo with our team.


