Playbooks
How to Build Custom Automations With Webhooks in V7
7 min read
—

Explore the Webhook Stage for seamless integration between applications in V7. Learn what webhooks are and how they can enhance your custom ML workflows.

Casimir Rajnerowicz
Content Creator


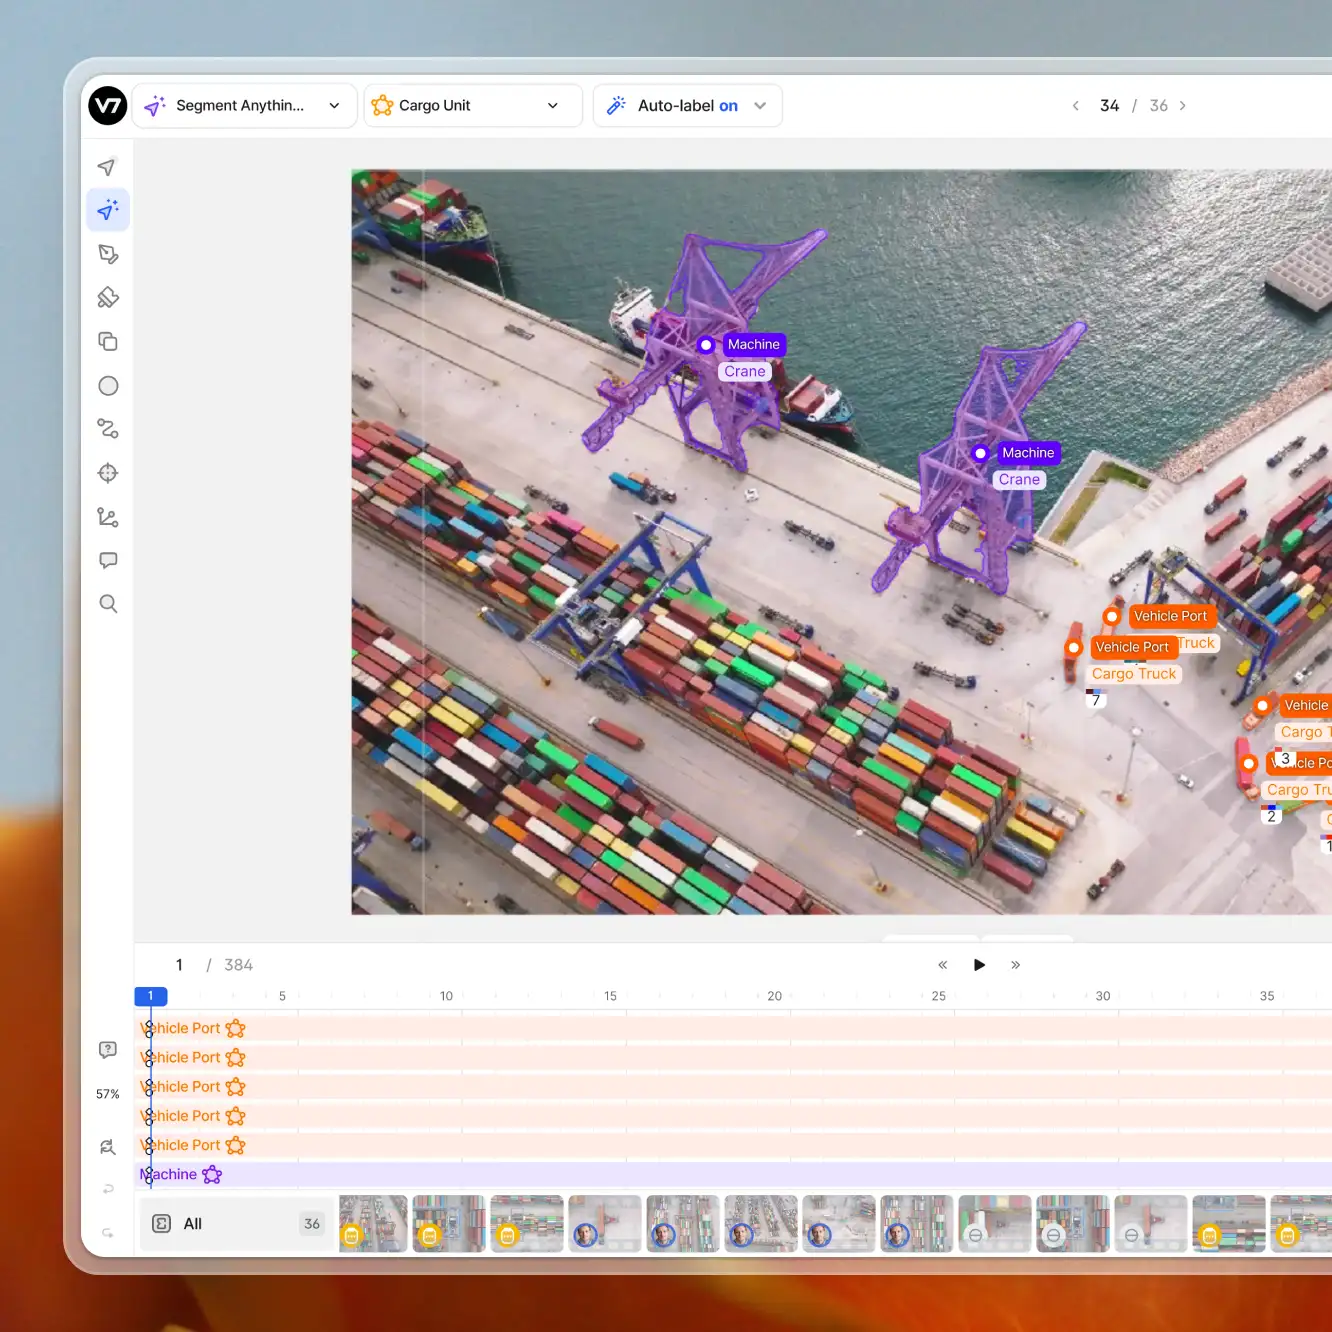
Data labeling
Data labeling platform
Get started today
Introducing the Webhook Stage
Just like review, annotation, or model stages, the Webhook Stage is one of the building blocks that you can use to design custom workflows in V7. As the name suggests, you can use this stage to send data across different web apps via webhooks, complete with a JSON payload.
What exactly is a webhook?
A webhook is a mechanism that allows one application to send data to another application in real-time. Webhooks work by sending an HTTP request to a URL address.

In other words, we are sending information via the HTTP protocol. You can think of a webhook as a kind of simple bot that receives our information, sends an HTTP request to a URL endpoint, and delivers the payload.
You can generate these URLs in the receiving application. They include an endpoint where the data can be captured.
If we check the Include annotation data box in our Webhook stage settings, we can send the complete Darwin JSON file. It contains essential information, about the dataset, file, annotations, and user activities. You can check the full schema here.

If you want to test webhooks, you can use Webhook.site. It allows you to create a temporary URL that can receive and display the payload sent by a webhook.
Benefits of Using Webhooks
Webhooks are a powerful tool for connecting your V7 data annotation workflows to external apps. There are many reasons behind their popularity:
Convenience and Interconnectivity
Webhooks are a standardized system. They are easy to set up, and there are many frameworks and apps that already support them. For instance, you can generate special URLs and set up webhooks with Zapier, Typeform, Slack, etc.
Webhooks use URLs, which means you can include additional information that's not part of the payload by adding custom link parameters. To do this, simply precede the parameters with a question mark in the URL.

Automation
You can use webhooks to trigger all sorts of events, such as custom notifications. Webhooks can automate many repetitive tasks, such as adding tags. By integrating some additional tools, you can also use webhooks to trigger all sorts of complex operations, such as splitting images into smaller sections.
Monitoring and Reporting
Webhooks can be used to pass a variety of information in real-time. You can use them to monitor and report on your ML data annotation processes. It is possible to add custom scripts in apps like Google Sheets, capture information and save it as new rows of a spreadsheet.

This lets you create spreadsheet reports updated in real-time. For some, this method is more convenient than using complex analytics dashboards.
While webhooks can make your life easier, it is important to remember about certain limitations.
You can use the Webhook stage to send information from V7. But the webhook module in itself can't receive information back. And it can’t do any extra processing.
However, it's still possible to set up a custom command via V7 API that will be triggered by a webhook. For example, we can set up a webhook stage that, once an item enters it, triggers a custom command that assigns a tag to an image. But it's important to remember that webhooks alone won't solve everything, as there are multiple processes involved in automating complex tasks.
How to set up a new webhook stage in your workflow
To add a webhook stage in your V7 workflow, you can simply drag and drop it into your workflow and connect it with the other stages. But the crucial step is to determine which application you want to use and how you want to use it.
Step 1: Decide how you want to send information and generate your URL
Additional third-party tools like Zapier give you a lot of flexibility when it comes to setting up webhook automations. With Zapier, you can connect your V7 workflows to a vast array of other apps, such as Gmail, Trello, or Slack, to name just a few.
We can generate webhook URLs in Zapier and use them as action triggers:

On the other hand, some apps allow you to generate webhook-compatible URLs on their own. You can choose whether to connect directly or with an external app like Zapier.
For example, a Slack Notification can be configured with a native webhook created with your custom Slack app. But you can also set up webhooks with Zapier and configure your automations via a Zapier integration.

The automation in the image above, once fully configured and deployed, will send a notification to a Slack channel.
Step 2: Add the Webhook Stage to your V7 workflow
Open your workflow and add the Webhook Stage in the fitting place. Add the URL that you generated in Step 1 as the webhook endpoint.
In the example below, the Reviewer can reject annotations. On their way back to the annotation stage, the file passes through the webhook stage and triggers a Slack notification via Zapier-based URL.

Every time an annotation is rejected and the webhook automation is live, a notification will be sent to a Slack channel.
Step 3: Test it and see if it works
After you have added the webhook stage to your workflow and added the generated URL, you can test your automation to make sure it works correctly. You can do this by triggering the event that you want to set up the webhook for and checking if the notification is sent to the correct channel.
It's important to note that in some cases, you may want to use specific information from the payload to create advanced conditions. You can extract this information by mapping the raw payload onto dedicated fields in Zapier or your other app. This allows you to customize your automation even further and create more complex workflows.
Webhooks use standard HTTP request methods such as POST, PUT, and GET, which makes them quite universal and easy to integrate with other applications. This makes them a powerful tool for automating your workflows.
Use cases
Now that you know how to set up a webhook stage in V7, let's take a look at some popular use cases.
1. Notifications and review requests
One common use case for webhooks in ML data annotation workflows is to set up notifications for additional quality assurance. For example, you may want to set up a webhook that will notify a reviewer or annotation manager about necessary additional reviews. This can help ensure that your training data is accurate and of high quality.

This is best accomplished by combining your Webhook Stage with the Logic Stage. For instance we can add a tag, like “Difficult” or “Urgent” and use it to route items that need to be reviewed.
2. Finding discrepancies between human vs model annotations
Another use case is to use webhooks to find discrepancies between human and model annotations. For example, you can use the Consensus Stage with webhooks to send information when a blind test between a human annotator and an AI model shows a high level of disagreement.

If the agreement level between the annotators and models working with the same image falls below a specified IoU threshold, a complete JSON can be retrieved. This can help you identify areas where your model may need more fine tuning or where your human annotators may need additional guidance.
3. Tracking the performance based on a test sample
You can also combine webhooks with the Sampling Stage feature. For instance, it is very easy to set up a workflow in which only 5% of annotated images will be passed to a webhook stage. Based on that, you can monitor the progress of your data annotation project, assess quality, and collect information to detect patterns and predict outcomes.

Since webhooks can send the whole JSON file as payload, it is possible to decide which information you want to use as your metric. For example, you can capture information about the density of your annotations and image resolution from a 20% sample of your database to find if they affect the quality of your annotations.