Playbooks
3 min read
—


Explore V7’s Auto-Track feature for faster video annotation. Use automated instance segmentation and object tracking across frames to reduce delivery times for video labeling projects.

Casimir Rajnerowicz
Content Creator

Video annotation
AI video annotation
Get started today
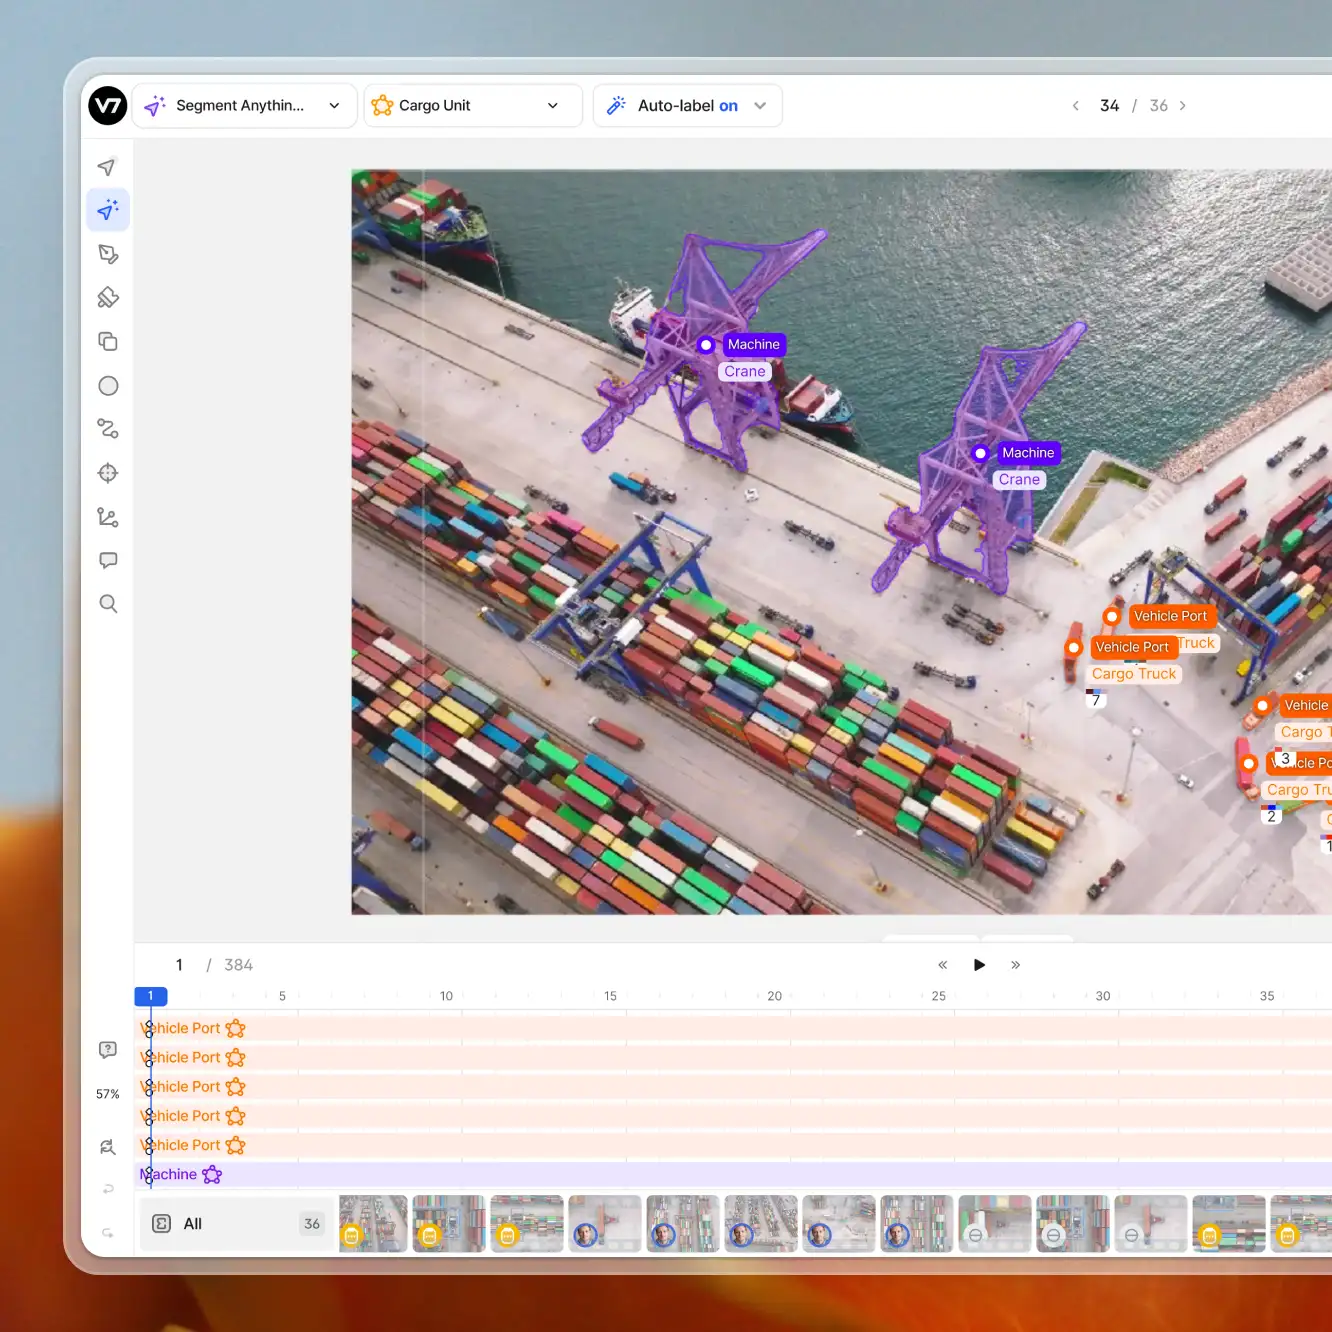
Our new Auto-Track feature speeds up video annotation by offering quick, precise instance segmentation and object tracking across video frames. This tool is designed to automate a significant portion of the work that goes into video labeling. It’s particularly useful in scenarios involving complex movements, changes in direction, and variable object shapes.
Key benefits:
Faster Project Completion. Auto-Track dramatically reduces annotation time, enabling faster project turnovers and a quicker time-to-market for AI products.
Cost-Effective Labeling. By automating the annotation process, Auto-Track significantly cuts down labor costs, allowing your business to divert funds to other critical areas of AI development.
Enhanced Scalability. Handling extensive video datasets is now effortless and economical, allowing for the expansion of projects without increasing time spent or resources used.
Auto-Track's core strength is making video clip annotation almost as simple as annotating a single image.
This is a real paradigm shift for your computer vision project. While video footage is often lower quality compared to still photos, it’s more reflective of real-world scenarios where data quality can vary drastically. Training models on video frames, which capture objects in various positions and with varying resolutions, is hugely beneficial. This approach not only enriches training data but also significantly boosts model performance in challenging situations.
Using videos instead of photos could be a game-changer for building your AI, and switching from photos to video footage today will give you a competitive edge in the rapidly evolving AI landscape.
Auto-Track uses an advanced ML model to track objects with complex movements and shape changes, offering a level of accuracy that surpasses traditional keyframe interpolation functionality.
Starting in late March, all V7 users will receive special access to Auto-Track for a limited one-month period. For details regarding further availability, please contact your Customer Success Manager.
How to use Auto-Track in V7
Auto-Track simplifies the once-complex process of video annotation into a streamlined, user-friendly workflow. It eliminates the tedious task of frame-by-frame annotation, freeing up your team to focus on more strategic aspects of your AI project.
To use this feature, upload your video to your V7 dataset and specify the frame rate. With longer clips it is a good practice to decrease your FPS parameter. You can read more about handling long video clips in V7 here.
Before you create your first annotation you may also want to adjust the default annotation length for convenience.

Now, create your first polygon annotation or a bounding box.
Once the annotation is added and visible in the timeline, you can adjust its length.
Click on the annotation and then select Auto-track motion.
You can choose from three options, all of which accomplish the same thing:
1. Click on the annotation centroid

2. Right click on the annotation in the timeline

3. Toggle the auto-track motion option in the timeline

After several seconds the new annotations should appear progressively in your timeline.
You can still adjust the results manually. Note that auto-tracked frames are marked in a different way than manual annotations. Additionally, if an object goes out of frame it will be indicated in the timeline.
To learn more about the technical aspects of the Auto-Track functionality, you can visit our documentation page.
Business implications of adopting Auto-Track
Switching to video annotation with Auto-Track is not just about adopting a new tool. It's about redefining how you approach AI development. Videos, as opposed to static images, provide a richer, more nuanced dataset that mirrors the complexity of real-world scenarios.

Realistic Data Representation. Videos provide a more accurate depiction of dynamic environments, essential for training AI to understand and interact with the real world.
Comprehensive Object Understanding. With videos and Auto-Track, AI models gain a deeper understanding of objects in motion, crucial for applications like autonomous driving or real-time surveillance.
Future-Ready AI Models. Training on diverse video data prepares your AI for future challenges, ensuring it remains effective as technology and user needs evolve.
Incorporating Auto-Track into your AI development process represents a strategic shift towards more efficient, accurate, and scalable AI. It's an investment in future-proofing your AI products, ensuring they remain relevant and competitive.


